If you've ever stood in front of an HP ProLiant server, staring at the BIOS screen and wondering how to set up RAID properly, you're not alone. RAID configuration can feel intimidating, especially when you're dealing with critical hardware and the fear of accidental data loss. But fear not - today, I'll walk you through the process step by step, just like I did when I recently reconfigured an old HP ProLiant with a P410i RAID controller.
Pro Tip: Always back up your data before making RAID changes. These operations are destructive and cannot be undone!

Accessing the RAID Configuration Utility
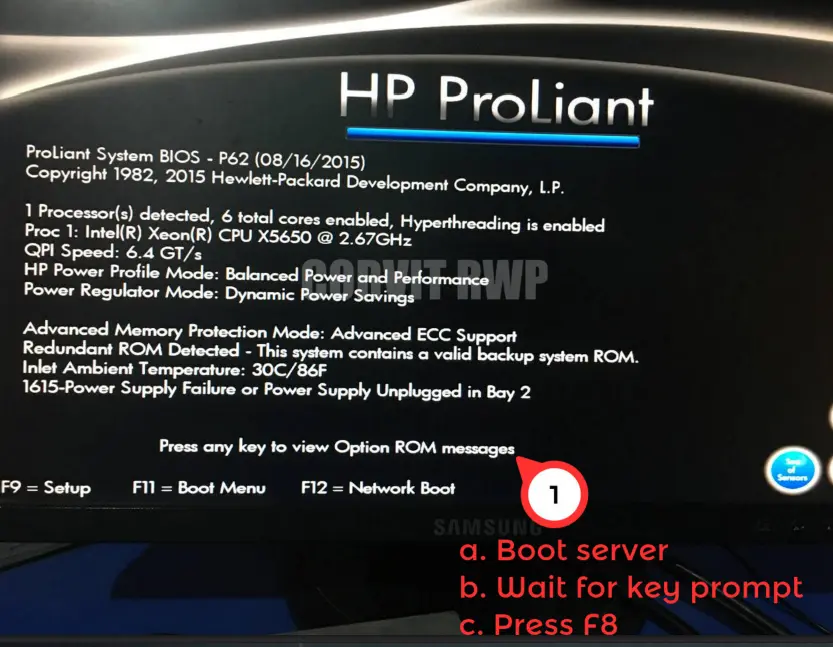
When you power on the server, you'll see the HP ProLiant System BIOS screen. Here's what caught my attention:
- Processor: Intel Xeon X5650 (6 cores, Hyperthreading enabled)
- Power Supply Warning: A concerning message - "1615 - Power Supply Failure or Power Supply Unplugged in Bay 2" - but since the server was running fine, I ignored it (for now).
To enter the RAID configuration:
- Press F9 to enter System BIOS Setup.
- Navigate to Array Configuration Utility (or press the relevant key during boot to enter the RAID controller directly).
In my case, the server booted straight into the Option ROM Configuration for Arrays, which is where the real fun begins.
Checking Existing RAID Setup
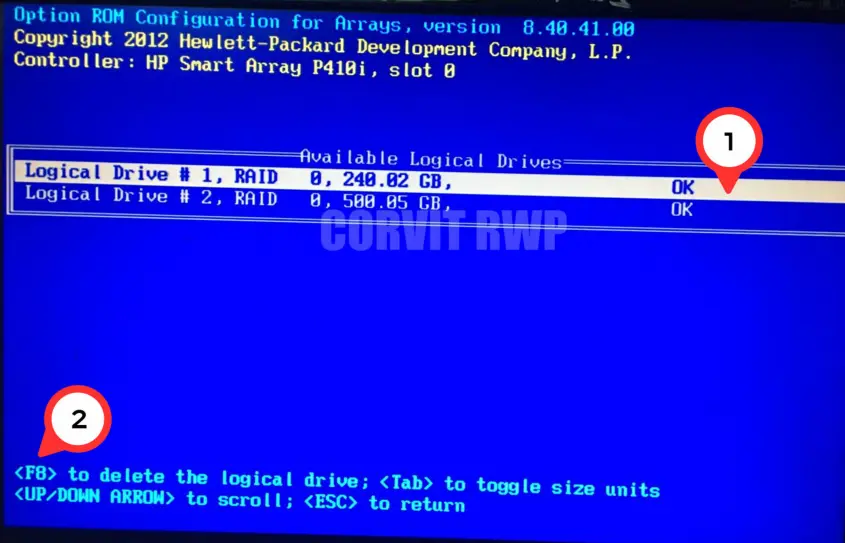
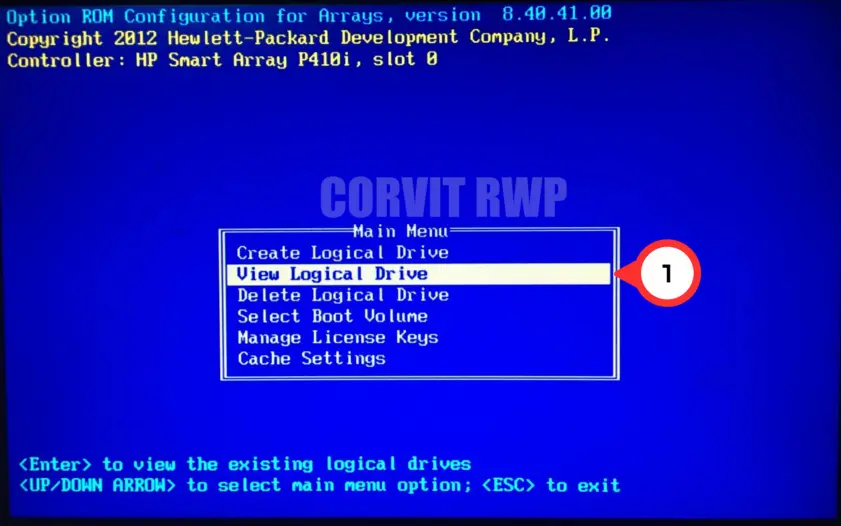
Before making changes, I wanted to see what was already configured. Selecting "View Logical Drive" showed:
- Logical Drive #1: RAID 0, 240.02 GB
- Logical Drive #2: RAID 0, 500.05 GB
RAID 0? That's risky - no redundancy. If a single drive fails, all data is gone. Since this was a lab server, I decided to delete these and set up a more resilient RAID 10 (1+0) configuration.
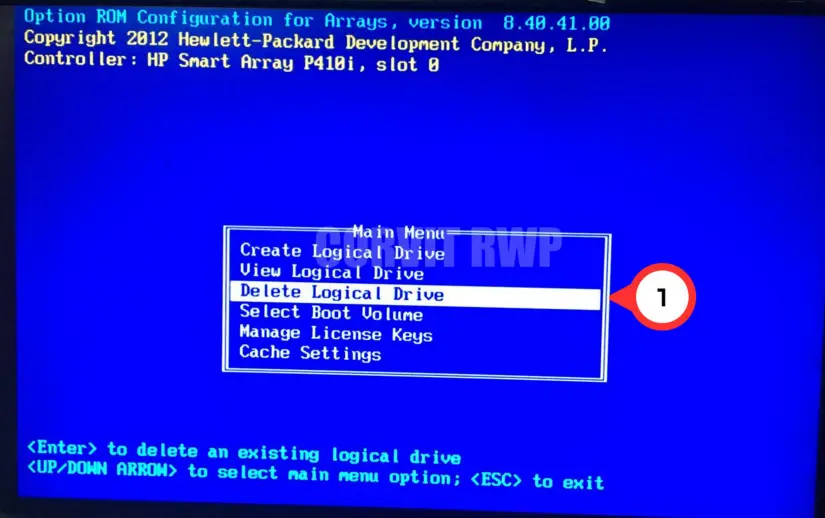
Deleting Old RAID Arrays
- From the Main Menu, I selected "Delete Logical Drive."
- I chose Logical Drive #1.
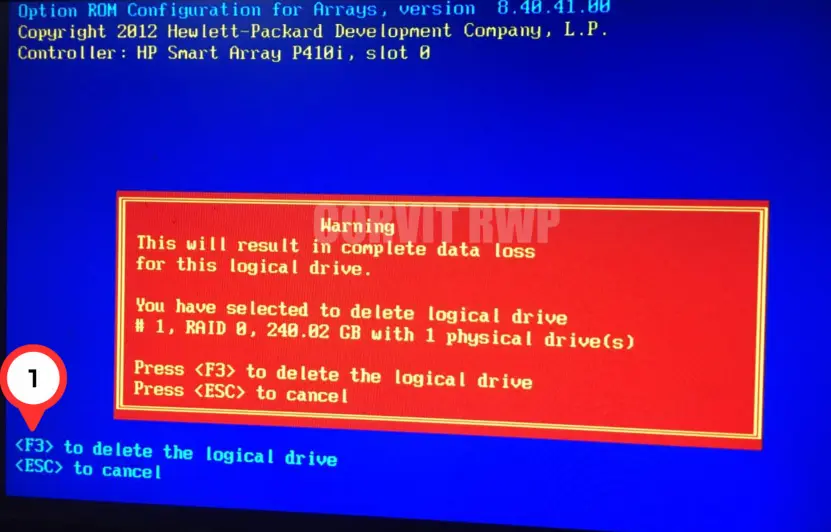
- A warning appeared: "This will result in complete data loss for this logical drive." (No worries - this was intentional.)
- Pressed F3 to confirm deletion.
- Repeated the process for Logical Drive #2.
- After deletion, the system confirmed: "Configuration saved".
⚠️ Warning
- RAID operations are destructive
- All data will be permanently lost
- No undo function available
Creating a New RAID 10 Array
Now, the real work begins.
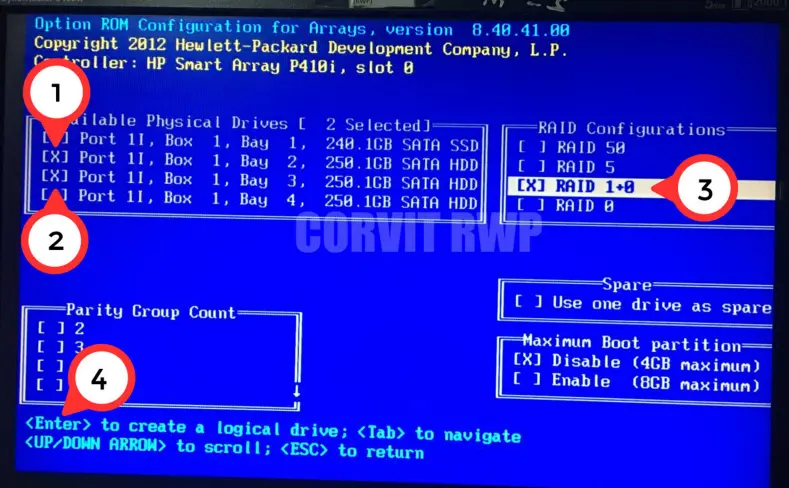
- Back in the Main Menu, I selected "Create Logical Drive".
- The system displayed available physical drives:
- Port 11, Box 1, Bay 1: 248.1GB SATA SSD
- Port 11, Box 1, Bay 2-4: 258.1GB SATA HDDs
- I selected two drives (Bay 2 & 3) for RAID 10.
- Under RAID Configurations, I chose RAID 1+0 (mirrored + striped for both performance and redundancy).
- Left Parity Group Count at default (since RAID 10 doesn't use parity).
- Pressed Enter to create the array.
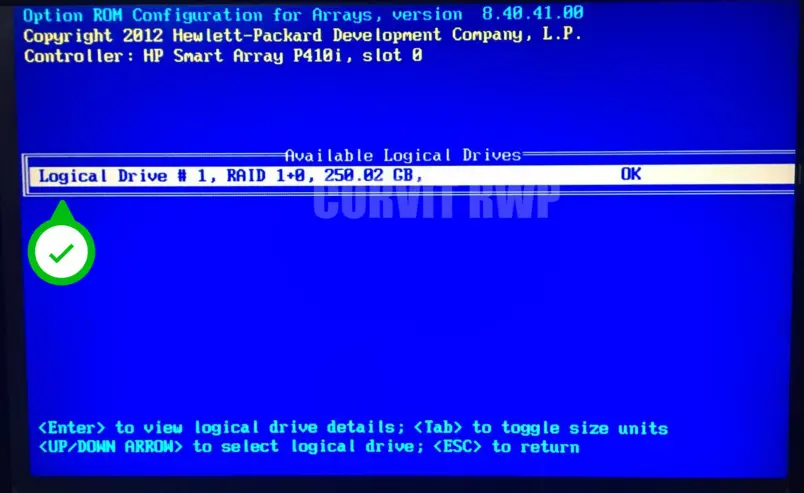
After a few seconds, the system confirmed the new RAID 1+0 Logical Drive (250.02 GB, Status: OK).
✅ Why RAID 10?
- Combines mirroring (RAID 1) and striping (RAID 0)
- Excellent performance for read/write operations
- Can survive multiple drive failures (from different mirrors)
❌ RAID 10 Drawbacks
- Requires even number of drives (minimum 4 for full benefit)
- Only 50% of total capacity is usable
- More expensive due to drive requirements
Final Thoughts
RAID configuration isn't just about clicking buttons - it's about understanding trade-offs:
- RAID 0 = Speed, but no redundancy.
- RAID 1+0 (10) = Best of both worlds (redundancy + performance), but requires more drives.
If you're setting up a production server, always:
- ✅ Back up data before making changes
- ✅ Verify drive health (check for warnings like the PSU error we saw earlier)
- ✅ Test the array before relying on it
Now, go forth and configure RAID like a pro! 🚀
Some of the screenshots showing RAID Configuration